
 I have an old sewing machine table that was given to me by my moms husband and it is one of those that you lift the top and lay it over to give you more space to sew and a small cubby for scissors, etc.
The problem is that the opening is for an unknown brand of sewing machine and it doesn't fit my Singer, Brother or Kenmore and no matter how much I have tried to balance them across the opening, it doesn't work.
Hubby donated a 3/4" piece of plywood to cover the opening and I got a few splinters and didn't want to snag fabric or batting, so today, I put my McGyver Quilting hat on and came up with the following idea and tutorial!
Supplies List:
Tape measure
Staple Gun (heavy duty)
Hammer
3/4" plywood cut to fit your table (mine was 38" long)
Batting (any kind will work)
Fabric to fit
Instructions:
Measure the length, width and height of your plywood. Mine was 38" so I cut my batting 41" wide and double the width of my plywood so I could fold it over and cover both sides.
Measure the length, width and height of your plywood. Mine was 38" so I cut my batting 41" wide and double the width of my plywood so I could fold it over and cover both sides.

I took it and smoothed it all flat, and folded the edge under, I stapled it all the way across the back so it looked like this when the batting was on. I brought the sides up like you would on a present and used 2 staples on each side. **If your staple goes in partially, use the hammer to knock it in the rest of the way!**

Do not at this time be concerned about the staples scratching the table as when it is covered with fabric we are going to do it a different way and it will be fine!

Do not at this time be concerned about the staples scratching the table as when it is covered with fabric we are going to do it a different way and it will be fine!
**I did have a video, but once again I cannot upload them to blogger**
This part might be a bit tricky to explain, however, I think most of you will understand it pretty easily. Find a large piece of fabric that will cover the width and length of your board. Take the fabric and lay it on a table or the floor, place the board on its lentgh wise side an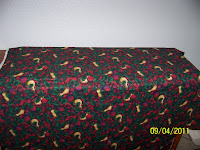 d pull the fabric up and around the batting covered board.
 d pull the fabric up and around the batting covered board.
I used my sewing table to this and let the extra hang down. I used the edge of the table as a guide and cut across the excess leaving enough fabric to once again fold as a present.
I took the fabric folded it under along the length of the board and stapled it along the edge. This way, the staples are not on the bottom of the table to scratch.
I folded up the sides like a present and brought them even to the edge and stapled it in 4 places.
When it was completed, I turned the stapled edge toward the wall and placed my machine back on the table  and in less than one hour and at no cost to my family as we had all the tools and fabric and batting at home, I have a way to use my sewing table and not worry about the machine falling through.
 and in less than one hour and at no cost to my family as we had all the tools and fabric and batting at home, I have a way to use my sewing table and not worry about the machine falling through.
However.....oh yes there is a however. I couldn't let it stop here, being as this machine area is in the basement I knew I would need something to keep my scissors, thread scraps, notions within easy reach, so I added a little sewing caddy that took 1 package of folded bias tape, 1 fat quarter, some scrap fabric and velcro and here is the finished project!!

The nice thing is when I do not need this, I can fold up the caddy, place it inside the table, removed the cover place it behind the table and close it up and it takes up no more space than before this was made!
If yo have any questions about this, please ask!
No comments:
Post a Comment